The transition from the freezing, harsh months of winter into the bright and promising days of spring is something every homeowner looks forward to. However, as the snow melts and the ice thaws, the true toll that winter weather has taken on your property slowly reveals itself. Heavy snow loads, relentless freeze-thaw cycles, biting winds, and ice accumulation can quietly compromise the structural integrity and efficiency of your home. Spring is the ultimate season of renewal, and there is no better time to give your property a thorough, top-to-bottom health check.
Undertaking a comprehensive spring walk-around is one of the most financially savvy habits you can develop. Proactive maintenance is always significantly cheaper than emergency restoration. By identifying minor vulnerabilities early, you prevent them from cascading into massive, budget-breaking disasters later in the year. Think of this checklist not as a burdensome chore, but as a strategic roadmap. It is designed to help you methodically assess your property, prioritize urgent fixes, and tackle necessary seasonal upkeep with confidence.
In this comprehensive guide, we will journey from the very top of your house all the way down to the foundation, landscaping, and utility systems. You will learn exactly what to look for, how to perform basic maintenance safely, and when it is time to put down the tools and call in an expert.

Inspecting the Top of Your Home After Winter Storms
Winter weather attacks the uppermost barriers of your house relentlessly. Ice dams build up on the edges, freezing and expanding under the shingles, while gale-force winds can easily lift or tear away essential protective layers. Your first spring priority is to ensure the topmost barrier of your house is intact before the heavy spring rains arrive.
Safely Assessing Shingle Granule Loss and Flashing Damage
You do not need to climb onto a steep, slippery pitch to perform a highly effective initial inspection. In fact, most preliminary assessments can be done safely with your feet firmly planted on the ground.
-
The Binocular Sweep: Grab a pair of binoculars and slowly scan the top of your house from the street and the backyard. Look for shingles that are curling at the edges, cracked down the middle, or completely missing.
-
Checking for Granule Loss: Walk around your property and look at the bottom of your downspouts. If you see heavy piles of coarse, sand-like granules, your shingles are rapidly aging and losing their protective ultraviolet coating.
-
Inspecting the Flashing: Pay special attention to the metal strips (flashing) around your chimney, skylights, and vent pipes. Winter ice dams often force their way under these metal barriers, causing them to bend or separate.
Addressing these localized vulnerabilities quickly minimizes the scope of any necessary roof repair. A few replaced shingles and some resealed flashing can save you from a massive headache down the line.
Knowing When to DIY vs. When to Call in a Professional
While cleaning a gutter from a sturdy ladder is a common weekend task, major elevated work requires strict safety boundaries. Walking on steep pitches, slate, or multi-story homes is incredibly dangerous without proper harnesses, scaffolding, and fall protection training.
If your binocular sweep reveals widespread missing shingles, deep sagging in the roofline, or significant structural issues, it is time to step back. In these situations, the smartest and safest move is to vet and hire a licensed, fully insured residential roofing contractor rather than attempting a highly risky DIY fix. They have the expertise to spot hidden rot and the equipment to perform the job safely and permanently.
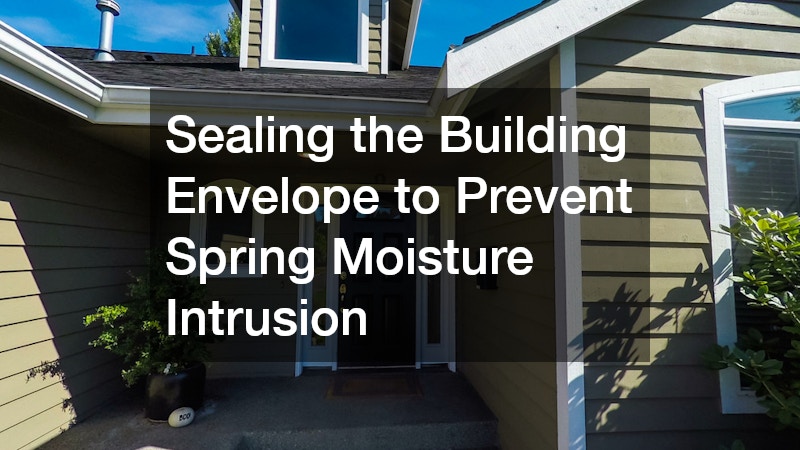
Sealing the Building Envelope to Prevent Spring Moisture Intrusion
Your home’s envelope consists of the siding, windows, doors, and foundation. Its primary job is to keep the climate-controlled air inside and the harsh outdoor elements outside. Winter causes building materials to contract, which can break seals and open up pathways for moisture and drafts.
Checking Caulk Lines and Weatherstripping Around Glass Panes
Drafty windows are a major culprit for high energy bills, and compromised seals let driving spring rains seep right into your drywall.
-
The Caulk Inspection: Walk the perimeter of your house and closely examine the exterior caulking where the window frames meet the siding. Look for signs of dry rot, deep cracking, peeling, or missing chunks of caulk.
-
Testing Tracks and Sashes: Open and close every window. If they stick or fail to lock properly, the frame may have warped.
-
Secondary Panes: If you have older, historic frames, ensuring the exterior secondary glass is seated properly is vital. Resolving drafty or stuck secondary panes through proper storm window repair drastically improves your home’s energy efficiency before the sweltering summer months force your cooling system into overdrive.
Evaluating Foundations and Siding for Freeze-Thaw Cracks
Concrete and masonry are porous. When water seeps into them during the winter and freezes, it expands, causing micro-fractures. Over several winters, these micro-fractures grow into severe structural cracks.
-
Clear the Perimeter: Rake away dead leaves, mulch, and debris from the base of your foundation so you can see the bare concrete.
-
Spotting the Fractures: Look for stair-step cracks in brick mortar, horizontal cracks in concrete blocks, or vertical hairline fractures in poured concrete.
-
Checking Siding: Look for warped vinyl, rotting wood clapboards, or cracked stucco that might allow rain to get behind the vapor barrier.
Ignoring these exterior vulnerabilities during the wettest season of the year can quickly lead to basement flooding. Once water breaches the foundation, you are often looking at the need for expensive, invasive water damage repair that requires tearing out finished basement walls and floors.

Eradicating Hidden Biological Growth in Unseen Spaces
Moisture doesn’t just come from the outside; it is generated inside your home through cooking, showering, and breathing. During the winter, homes are sealed up tight, trapping this moisture indoors. If your home lacks proper ventilation, this trapped humidity creates the perfect breeding ground for spores.
Spotting Condensation Issues in Your Highest Storage Areas
Warm, moist air naturally rises. If your upper-level ventilation is blocked by improperly installed insulation or clogged soffit vents, that warm air gets trapped directly under the cold roof deck. This causes heavy condensation to form on the wood sheathing and rafters.
-
The Sniff Test: When you open the hatch to your upper storage space, does it immediately smell stale, musty, or earthy? That is a primary indicator of biological growth.
-
Visual Indicators: Shine a bright flashlight on the underside of the wood decking. Look for dark black, green, or white powdery stains spreading across the wood or the insulation.
-
Checking the Nails: Look at the roofing nails poking through the wood. If they are heavily rusted or have water droplets hanging from them, your ventilation is failing.
If significant growth is spotted on the wood sheathing, it is a serious issue that usually requires specialized attic mold services to safely remediate the space. Professionals use negative air pressure and antimicrobial sealants to kill the spores without spreading them through your HVAC system into the living areas below.
Safe Protocols for Eliminating Mildew in Basements and Crawlspaces
The lowest levels of your home are equally susceptible to moisture problems, especially as spring groundwater levels rise and seep through porous concrete walls.
-
Inspect Behind Storage: Move boxes and furniture away from basement walls. Check behind drywall, under carpets, and particularly around sump pumps and floor drains.
-
DIY vs. Professional: If you find a tiny patch of surface mildew on a concrete wall (under 10 square feet), you can often handle it yourself using a mixture of water and dish soap, or a commercial antimicrobial spray (avoid bleach, as it only bleaches the color but doesn’t kill the root on porous surfaces).
-
Knowing When to Call for Help: If the contaminated area is extensive, has infiltrated porous materials like drywall or carpeting, or is causing allergy symptoms in your family, you need professional, whole-room mold removal to ensure the environment is completely sterilized and safe to breathe.

Priming Your Climate Control Systems for Summer Heat
Your cooling system has likely been sitting dormant for months. Expecting it to instantly perform at peak efficiency on the first 90-degree day of the year without any preparation is a recipe for a sudden breakdown. Spring is the time to pamper your system.
Clearing Debris and Replacing Filters for Maximum Airflow
An air conditioner needs to breathe to function. If airflow is restricted, the system works twice as hard, driving up your energy bills and shortening the lifespan of the equipment.
-
Outdoor Unit Clearance: Go to your exterior condenser unit. Rake away all dead leaves, trim back encroaching bushes, and remove twigs that have fallen inside the grill. You want at least two feet of clear, unobstructed space around the entire unit.
-
Indoor Filter Replacement: Inside, locate your furnace/air handler. Pull out the filter. If it is grey, clogged with dust, or opaque when held up to the light, throw it away. Install a fresh, high-quality pleated filter. This simple step prevents the evaporator coil from freezing over.
-
Professional Tune-Ups: It is highly recommended to book a routine HVAC inspection in early spring, well before the summer rush begins. A licensed technician will test electrical voltages, clean the delicate interior coils, and verify that the system is operating at peak efficiency.
Diagnosing Freon Leaks and Compressor Issues Early
You want to find out if your system has a problem in April, not in July during a massive heatwave when technicians are booked out for weeks.
-
The Early Test Run: Pick a mild spring day and turn your thermostat down to cool. Let the system run for 15-20 minutes.
-
What to Listen and Feel For: Go to the vents. Is the air blowing out ice cold, or just lukewarm? Go outside to the condenser. Does it sound smooth, or is there an aggressive grinding, clanking, or unusual hissing sound?
-
Monitor Your Bills: Keep an eye on your electricity bill during the first few weeks of usage. An unexplained spike often indicates the system is struggling.
Catching a refrigerant leak early can often mean the difference between a relatively minor, affordable AC repair and needing to completely replace a burned-out, overworked compressor.

Reviving Exterior Utility and Irrigation Equipment
As you wrap up the structure of the house, your final focus should be on the exterior systems that keep your property functional and beautiful. From emergency power to landscape maintenance, these systems require careful de-winterization.
Testing Backup Power Reliability Before Spring Thunderstorms
Spring brings heavy, unpredictable weather. Severe thunderstorms, high winds, and heavy rainfall frequently knock down power lines, leaving entire neighborhoods in the dark.
-
Visual Inspection: Open the housing of your standby power unit. Look for any debris that might have blown inside. Inspect the battery terminals for corrosion and ensure the connections are tight.
-
Fluid Checks: Just like a car, these units require fresh oil to run smoothly. Check the oil levels and top them off or change the oil according to the manufacturer’s manual.
-
The Load Test: Turn off your home’s main breaker to simulate an outage and force the unit to kick on. Let it run for at least 15 minutes under a full load to ensure it can actually power your essential appliances.
Spring is notorious for outages, making it the absolute worst time to discover your backup battery is dead and you are in desperate need of emergency generator repairs while the storm rages outside.
Flushing Winterized Valves and Adjusting Spray Heads
If you live in a climate that experiences hard freezes, your irrigation system was likely blown out and winterized in the fall to prevent the underground pipes from shattering. Waking the system up requires patience and observation.
-
Slowly Introduce Water: Locate your main irrigation shut-off valve. Do not just yank it open. Turn it on incredibly slowly to allow the pipes to fill gradually. Rushing this process causes “water hammer,” a pressure shockwave that can blow apart valves and fittings.
-
Check the Backflow Preventer: Ensure the backflow device isn’t leaking, as this protects your home’s drinking water from being contaminated by yard runoff.
-
The Zone-by-Zone Test: Turn on your system manually, running one zone at a time. Walk the yard as it runs. Look for geysers shooting up into the air, which indicate broken lawn sprinklers that were clipped by a snowplow or cracked by ice. Ensure the spray patterns are directed at your grass and plants, not pounding against your siding or flooding your foundation.
Conclusion
Methodically moving through a comprehensive spring checklist is one of the most rewarding ways to care for your property. By dedicating a few weekends to thoroughly inspecting your home’s exterior, sealing up the building envelope, checking for hidden biological growth, and tuning up your utility systems, you are actively protecting your home’s structural integrity. More importantly, you are preserving your property’s value and ensuring a safe, comfortable environment for your family.
Remember, you do not have to tackle this entire list in a single, exhausting weekend. Pace yourself. Start with the most critical exterior envelopes—like inspecting the roofline and foundation—and gradually move inward toward your climate control and outdoor utility systems. Create a schedule that works for you, perhaps tackling one section per week as the weather warms up.
If you uncover issues during your inspection that require specialized tools or knowledge, do not hesitate to reach out to the pros. Would you like me to help you draft an email template you can use to request quotes from local contractors for any of the inspections mentioned in this guide?